


As a Software Developer, you've probably worked on a project where you need to communicate some information in real-time from your Nodejs application.
This information can be anything from password reset to notifications on subscription services, to changes in terms and services. There's a whole lot of information that can be communicated and there are several ways through which we can send this information.
In this article, we will learn how to send emails from a Nodejs application using nodemailer.
Why use Nodemailer?
There are different reasons why we should use Nodemailer to send emails, I've listed some of them below:
We can send different types of data like plain text, HTML content, etc.
It has OAuth2 authentication.
It has Unicode support for any character, which means we can send emojis within our emails
It uses different transport methods like the SES transport method in addition to the built-in SMTP support.
Prerequisites
To follow along, you would need the following:
A code editor of your choice (preferably VS Code) and a stable internet connection.
An updated version of the Nodejs software is installed on your local device. You can visit the Nodejs download site and follow the prompts to install it.
Minimal experience working with nodejs applications using express.js
Experience using API testing tools (preferably postman)
Now let's get to coding.....
Initializing our Nodejs project
Create a new folder, with any name of your choice and open it with your code editor. In this case, we used VS Code and we have named our folder "nodemailer-tutorial".
Open up your terminal and type in the following command
npm init -yThis will initialize our Nodejs project and create a package.json file with the default options.
Now we need to install the dependencies that will be needed for this project. On your terminal, type in the following command and press enter.
npm install cors dotenv express nodemailerExpress.js (express), is a back-end web application framework for building RESTful APIs with Node.js.
cors is a node.js package that enables websites to support the CORS(Cross-Origin Resource Sharing) protocol.
dotenv is a lightweight npm package that automatically loads environment variables from a .env file into the process.env.
nodemailer is a nodejs module that allows you to send emails from your server easily.
We also need a package called nodemon that automatically restarts the node application whenever it observes the changes in the file present in the working directory of your project. For that type in the following command in your terminal and press enter.
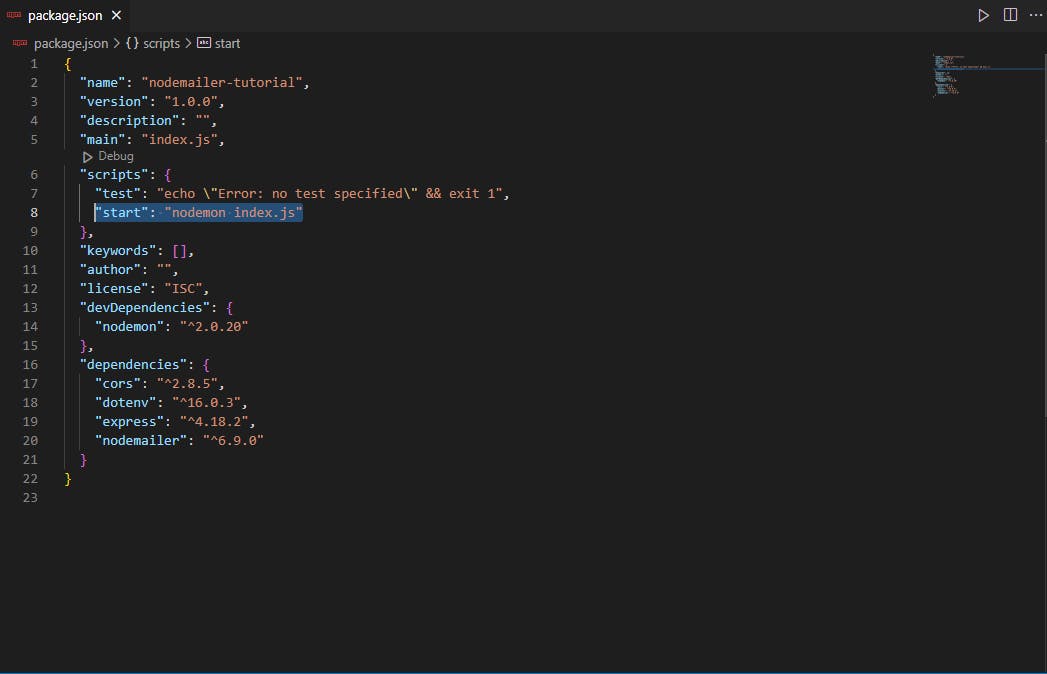
npm install --save-dev nodemonNow we're done with the installation, go into the package.json file and within the script object, add this line of code.
"start": "nodemon index.js"If you are prompted with an error, then maybe you forgot to add a comma after the first item in the object. Do that and hit save. Your package.json file should look like this
For the next step, we need to create files and folders for our application.
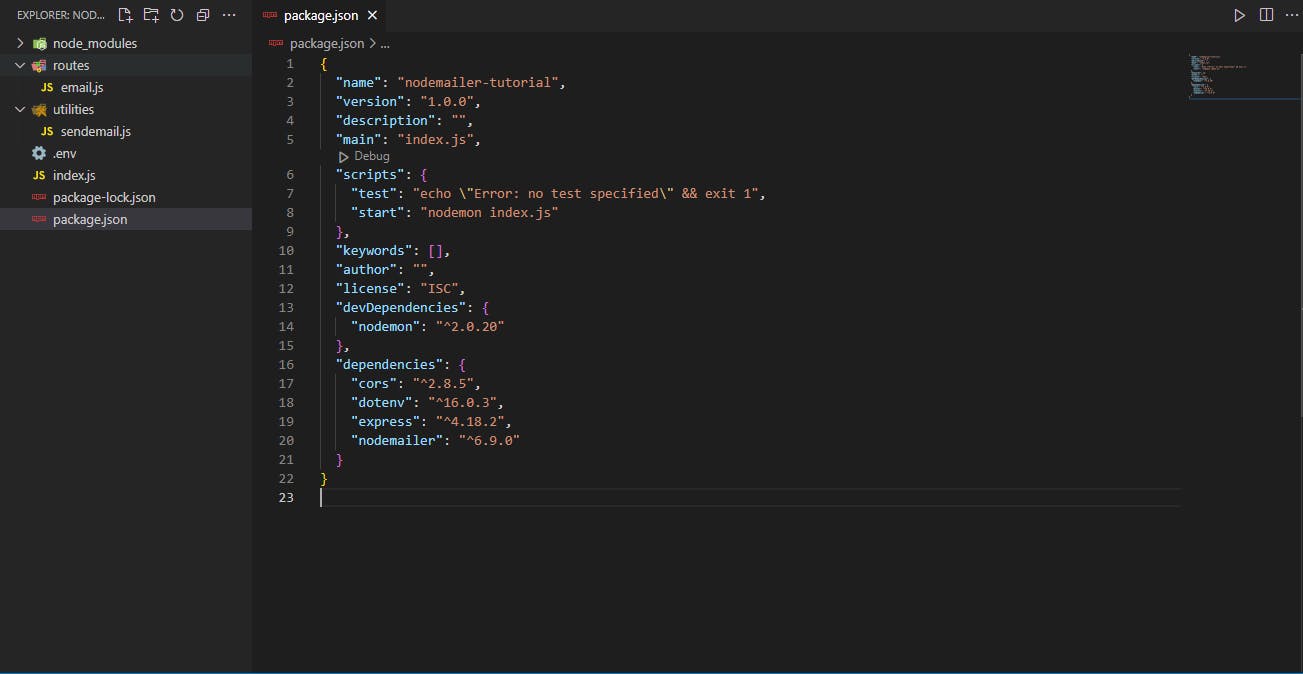
Within your project folder, create a file named index.js, another file named .env and 2 folders named utilities and routes respectively. In the utilities folder, create a file called sendemail.js and in the routes folder create another file called email.js.
Your folder structure should look like this:
Configuring our App and Creating Routes
Navigate to your index.js file and write the lines of code below:
const express = require("express");
const cors = require("cors");
const dotenv = require("dotenv");
const app = express();
const email = require("./routes/email");

app.use(express.json());
app.use(
  cors({
    origin: "*",
  })
);
dotenv.config();

app.get("/", (req, res) => {
  res.status(200).send("Welcome");
});

app.use("/email", email);

app.listen(process.env.PORT || 3000, () => {
  console.log(`Server is up and running`);
});
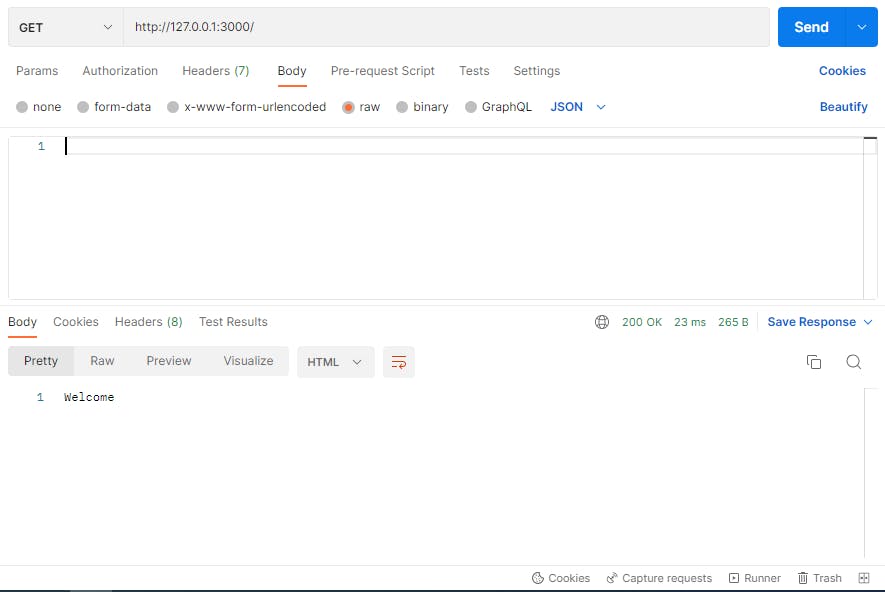
Here, we are importing the modules and packages we imported earlier and then configuring them. Also, we set up our app to listen on port 3000. To start up our application, open your terminal, type in npm start and hit enter. You should see a message that reads "Server is up and running". Go to postman and send a get request to this URL http://127.0.0.1:3000/. You should be met with a "Welcome" message like the one below.
Now go into the email.js file and then type in the following lines of code
const router = require("express").Router();
const sendMail = require("../utilities/sendemail");

router.post("/", async (req, res) => {
  try {
    // Here is where we write our logic and functionalities to send the email
  } catch (error) {
    res.status(500).send(error.message);
  }
});

module.exports = router;
Here we just set up the route that will be used for sending our emails. We also imported a module in the second line which is a function that defines how our emails are sent and structured.
Before we write out this function, we need to enable some security features on our host account (the email address from which we would send out emails). Go to your account settings and set up an "Application specific" credential for your nodejs application and you'll be provided with a password. Open up the .env file and type the following code.
HOST = smtp.gmail.com
SERVICE = gmail
EMAIL_PORT = 587
SECURE= true
USER = tutorial@gmail.com //Replace with your email address
PASS = password // Replace with your application-specific password
Note*: We are using Gmail in this tutorial. The settings might be different if you use another email service.*
Now go over to the sendemail.js file and type in the following code
const nodemailer = require("nodemailer");

module.exports = async (email, subject, text) => {
  try {
    // initialize and define the mode of transport
    const transporter = nodemailer.createTransport({
      host: process.env.HOST,
      service: process.env.SERVICE,
      port: Number(process.env.EMAIL_PORT),
      secure: Boolean(process.env.SECURE),
      auth: {
        user: process.env.USER,
        pass: process.env.PASS,
      },
    });

    // Defining the mail and sending it using the transport
    const sentEmail = await transporter.sendMail({
      from: process.env.USER,
      to: email,
      subject: subject,
      text: text,
    });
    const response = "Email sent successfully";
    console.log(response);
  } catch (error) {
    console.log(error.message);
    return response;
  }
};
Here, we created a function and within it, we used the nodemailer package to create a transport. Transport defines the method and medium that will be used to send the email. We also called the sendMail method that sends the email using the preselected transport object.
You can access the nodemailer documentation to learn more about these methods and parameters.
Back to the email.js Route
We can now use the sendemail function. To do that, update the code to look like this
const router = require("express").Router();
const sendMail = require("../utilities/sendemail");

router.post("/", async (req, res) => {
  try {
    const email = await req.body.email;
    const message = await req.body.message;
    const subject = await req.body.subject;

    const sentEmail = await sendMail(email, subject, message);

    return res.status(200).send("You email is on the way");
  } catch (error) {
    res.status(500).send(error.message);
  }
});

module.exports = router;
Let's test this out on postman. Copy the JSON object below and provide the details you want to send:
{
    "email": "myaddress@gmail.com", //Input the address you want to mail
    "subject": "Testing my email server", //Change to any subject you want
    "message": "Confirm you can see this" //Use a personalized message of your choice
}
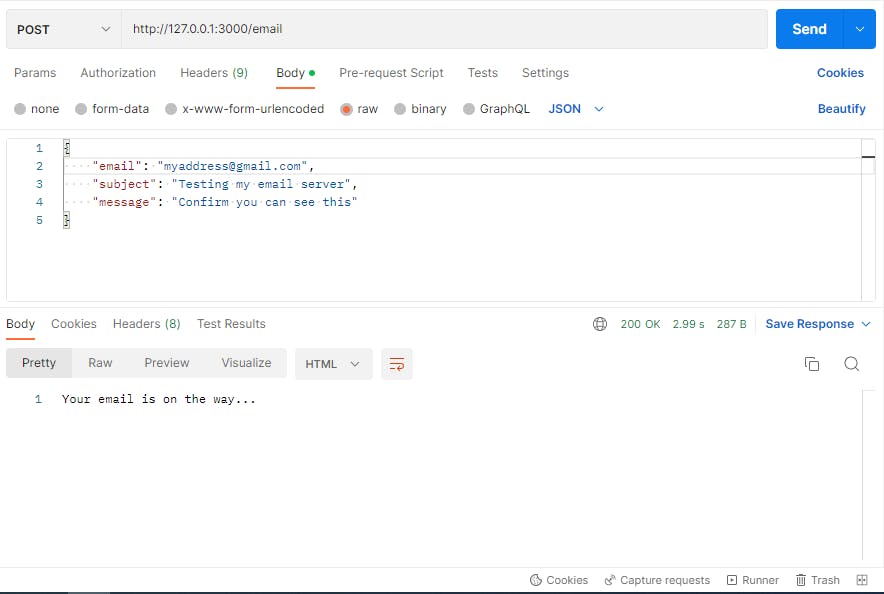
Back to postman, go to "Body", click on "raw" and then select JSON. Paste the JSON object into the text area and send a post request to http://127.0.0.1:3000/email. Your request should look like this
Now check your recipient email inbox and you will see your message sitting right there waiting to be clicked.
Conclusion
And that's a wrap. We've successfully built a Nodejs application that enables us to send emails using Nodemailer: a module that allows you to send emails from your server with ease.
I've provided a link to the project on GitHub. Here you can find all the code snippets used for this project.
If you have any questions or suggestions, I'll be buzzing to hear from you in the comment section.
Happy coding 💫